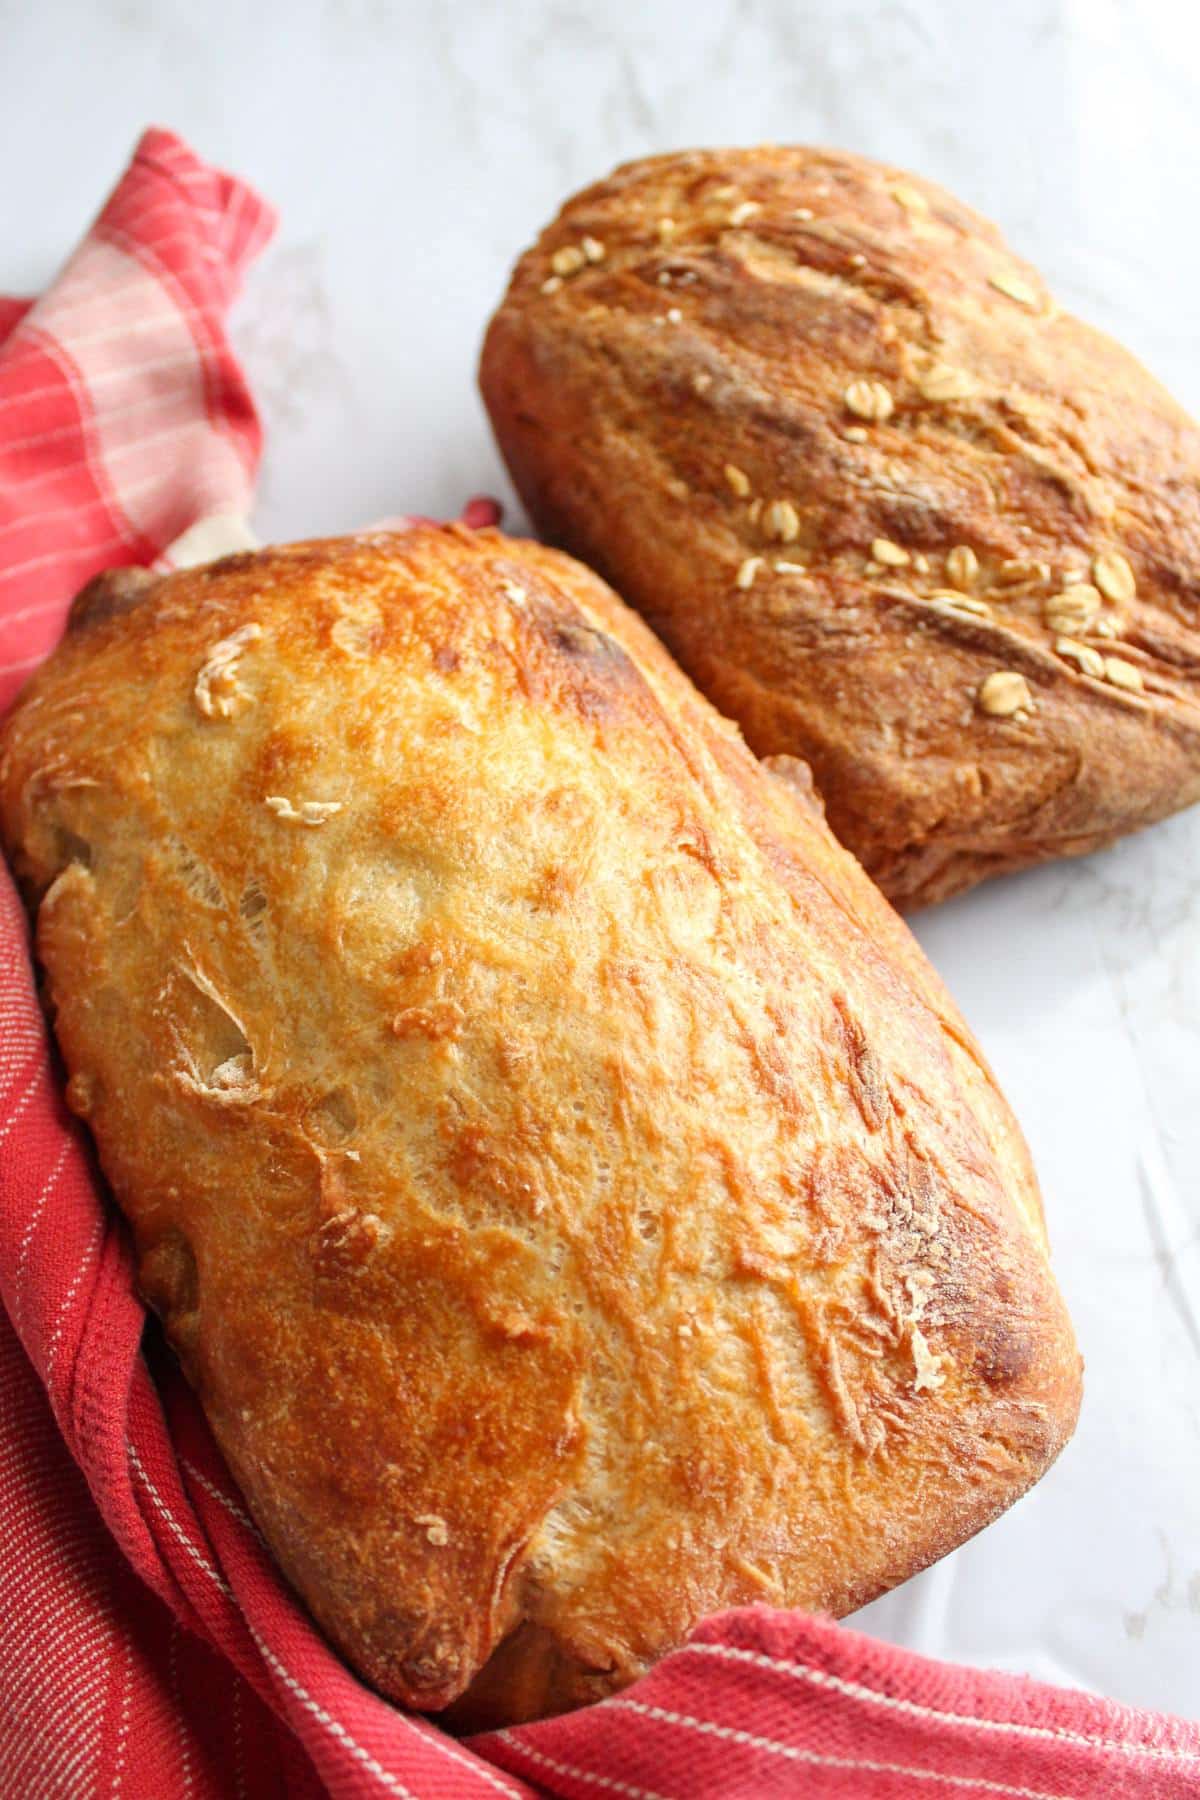
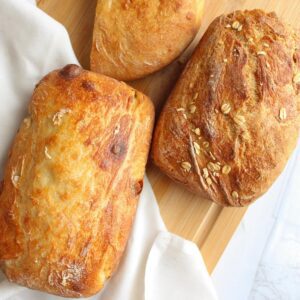
The easiest and best vegan bread you will ever make. Only three ingredients and five minutes of prep time. The rest is just rising and baking time. Tastes like it came fresh from the bakery. Super affordable, artisan bread with a perfect, crunchy crust and soft, fluffy inside.
Jump to:
❤️ Why you'll love this recipe
- This homemade bread only uses three ingredients (I don't count water as an ingredient). How many foods can say that? Store-bought bread definitely can't.
- It only takes five minutes to mix together your own vegan bread. The rest of the time is used to let it rise (8 hours)
- You can mix the dough up in the morning and then have fresh bread by dinner.
- You can also make this dough at night and let it rise over night.
- Not only is this the easiest homemade vegan bread recipe you will find, it’s also insanely tasty.
- This bread is so light and airy and has the perfect crunchy crust.
- Insanely affordable! I would and have easily paid $7 a loaf for a high quality bread like this at stores. It feels so good to make this bread at home for a fraction of the cost.
🧂 Ingredients
I love that this recipe is made with pantry staples and contains no artificial ingredients.
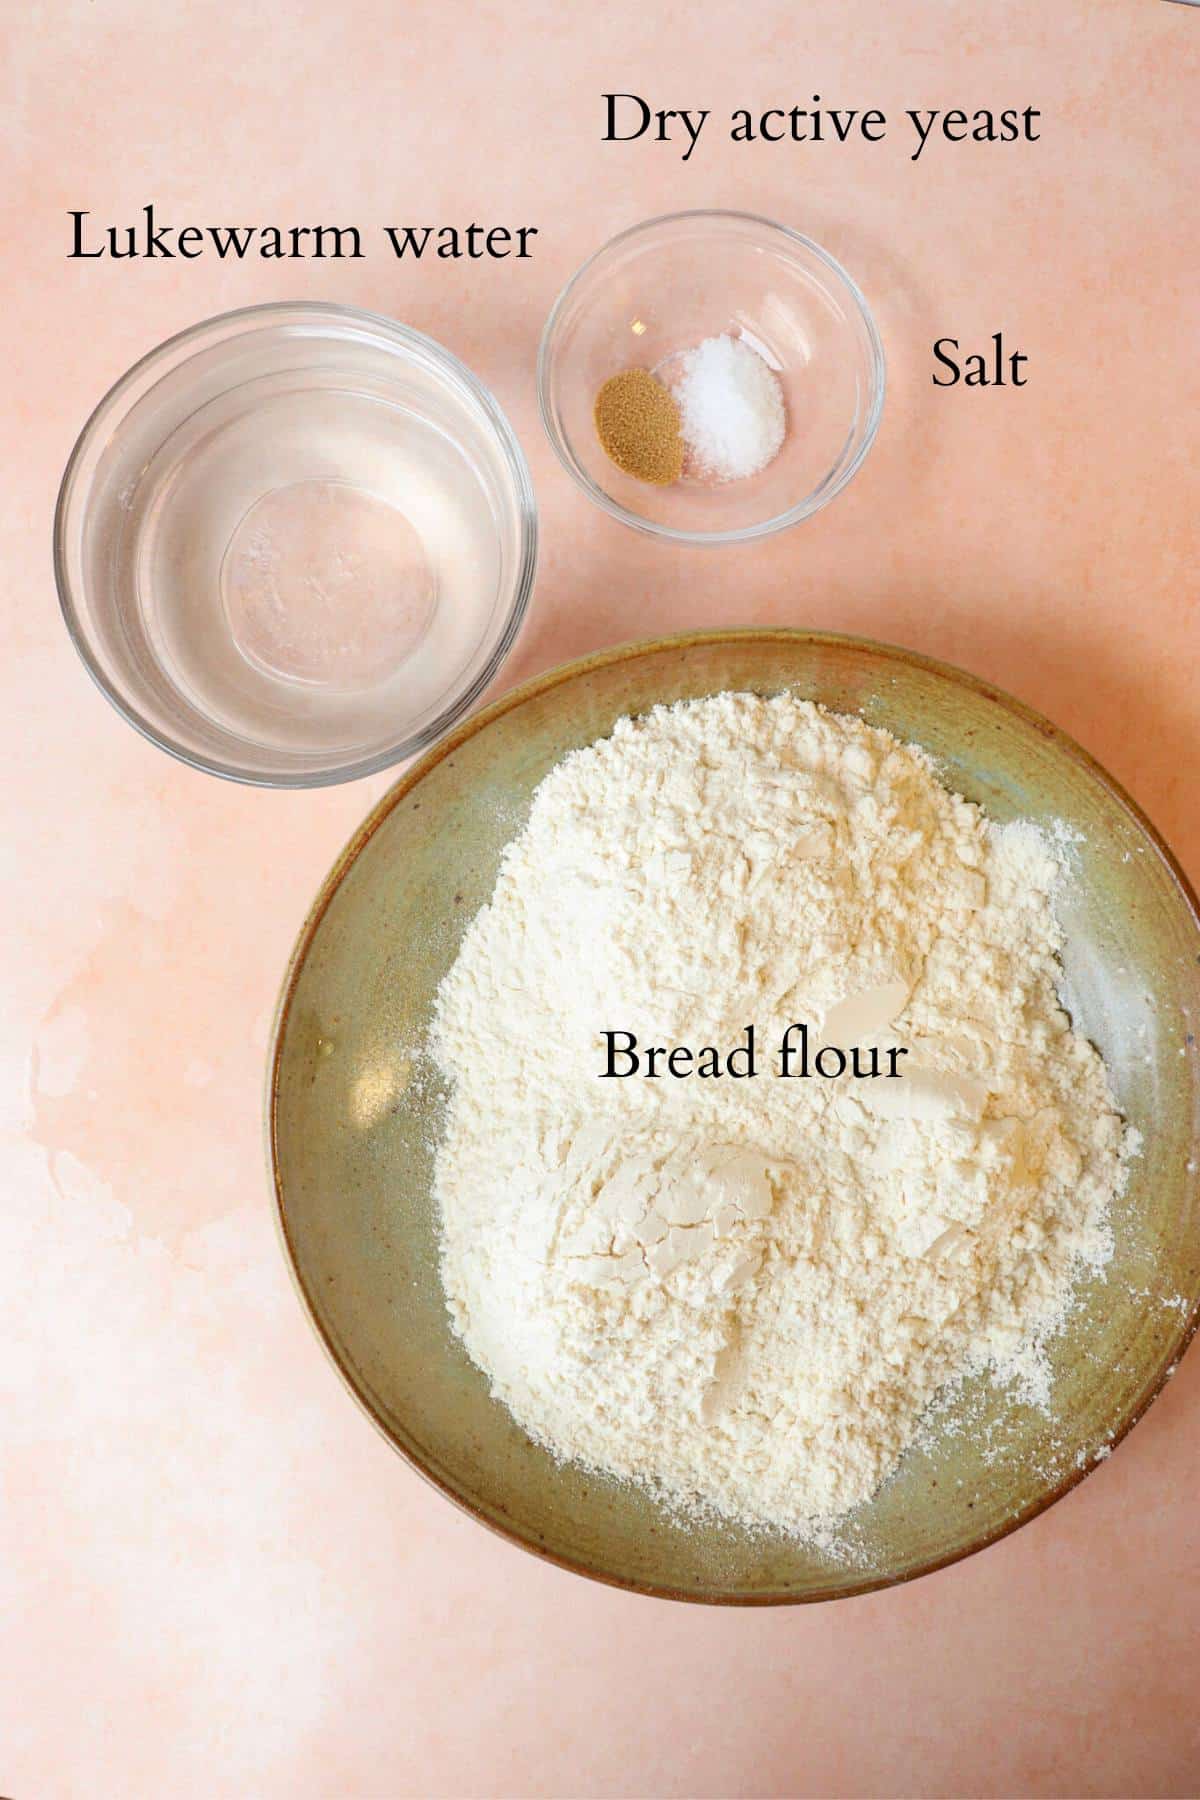
- bread flour - has more gluten and makes for a chewier bread. More gluten also means higher protein since gluten is the protein found in wheat.
- salt - a little goes a long way. This just helps to enhance the flavor of the bread.
- active dry yeast or instant yeast - I buy this in bulk and keep it in my freezer to always have some yeast on hand.
- lukewarm water - this helps to activate the yeast gently.
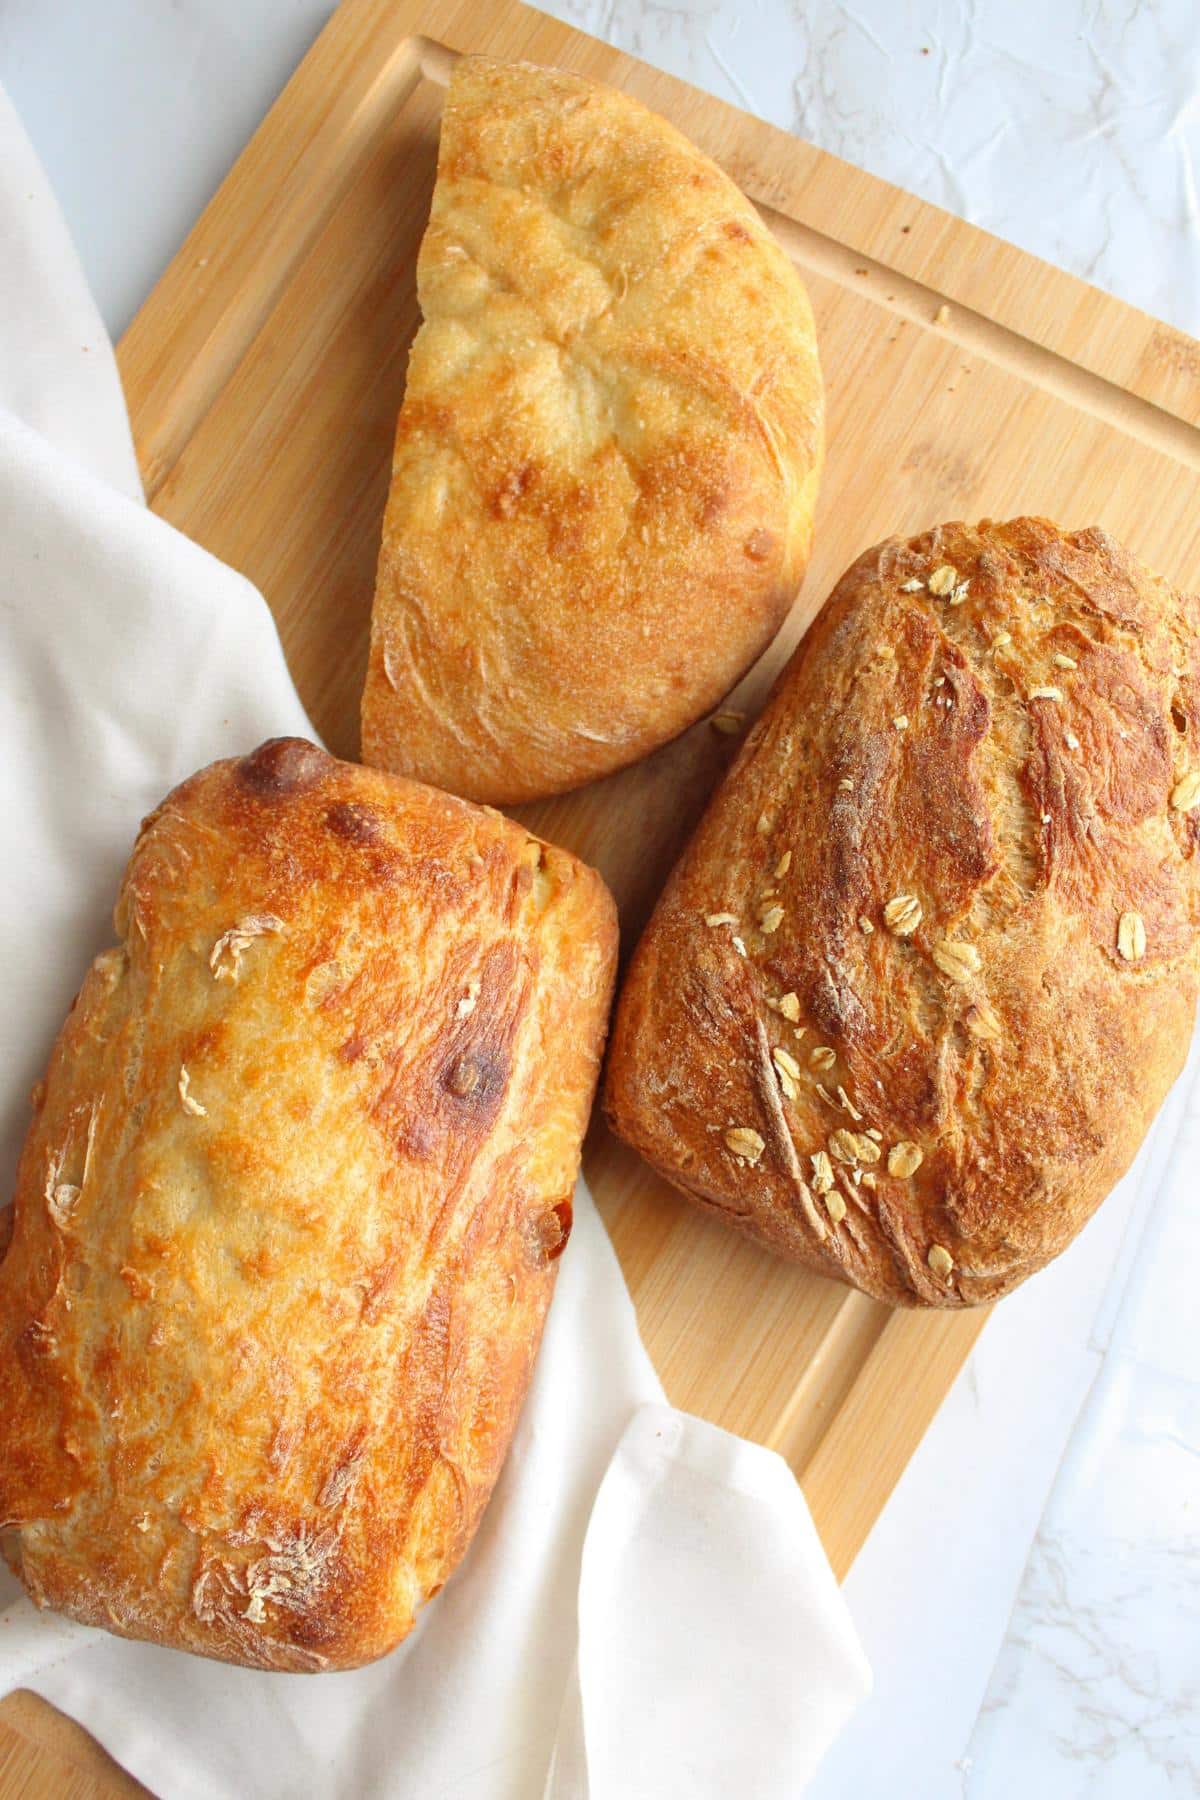
🥖 Flour variations
I've used all purpose flour instead of bread flour and it worked just fine. If you want to make more of a whole wheat instead of a white bread, you can do half all purpose and half whole wheat flour.
There are a few different flour combinations you can try to make this loaf of bread a bit healthier and wholesome. My brother tested out different combinations and gave me some tips.
Instead of 3 cups of bread flour try:
- 1 cup of whole wheat flour and 2 cups of bread flour
- OR 1 cup of oat flour (just blend old fashioned oats in a blender to make flour) 2 cups of bread flour
- OR 1 cup of oat flour and 2 cups of whole wheat flour
- For all of the above combinations bake them a little longer: 40 minutes covered then 20 minutes uncovered
Just remember that the healthier versions will be a little more dense, which isn’t a bad thing.
👩🍳 Expert tips
- If you want a more light and airy bread, only knead it for 30 seconds to a minute
- If you’d like a denser bread, like for sandwiches, knead the dough for 5-10 minutes.
- Get an oven thermometer. You'd be surprised how inaccurate ovens can be. This helps to make sure it gets hot enough to bake the bread.
- Cover the dough with a clean dish towel when rising. Covering it prevents the dough from drying out
- Cover the dough with another bread pan, turned upside down, when baking. Or bake in a dutch oven with a lid. This gets the dough surrounded by steam and forms an amazing, crunchy crust.
- Store your yeast in the freezer! It will keep in there forever
🌾 How to measure flour correctly
It's important to measure flour correctly when baking because if you have too much flour, it will throw of the water to liquid ratio and could result in dry, crumbly dough.
The most accurate way to measure flour is to use a kitchen scale. But, if you're like me and haven't invested in one of those yet, the second best way to measure flour is to do the spoon method.
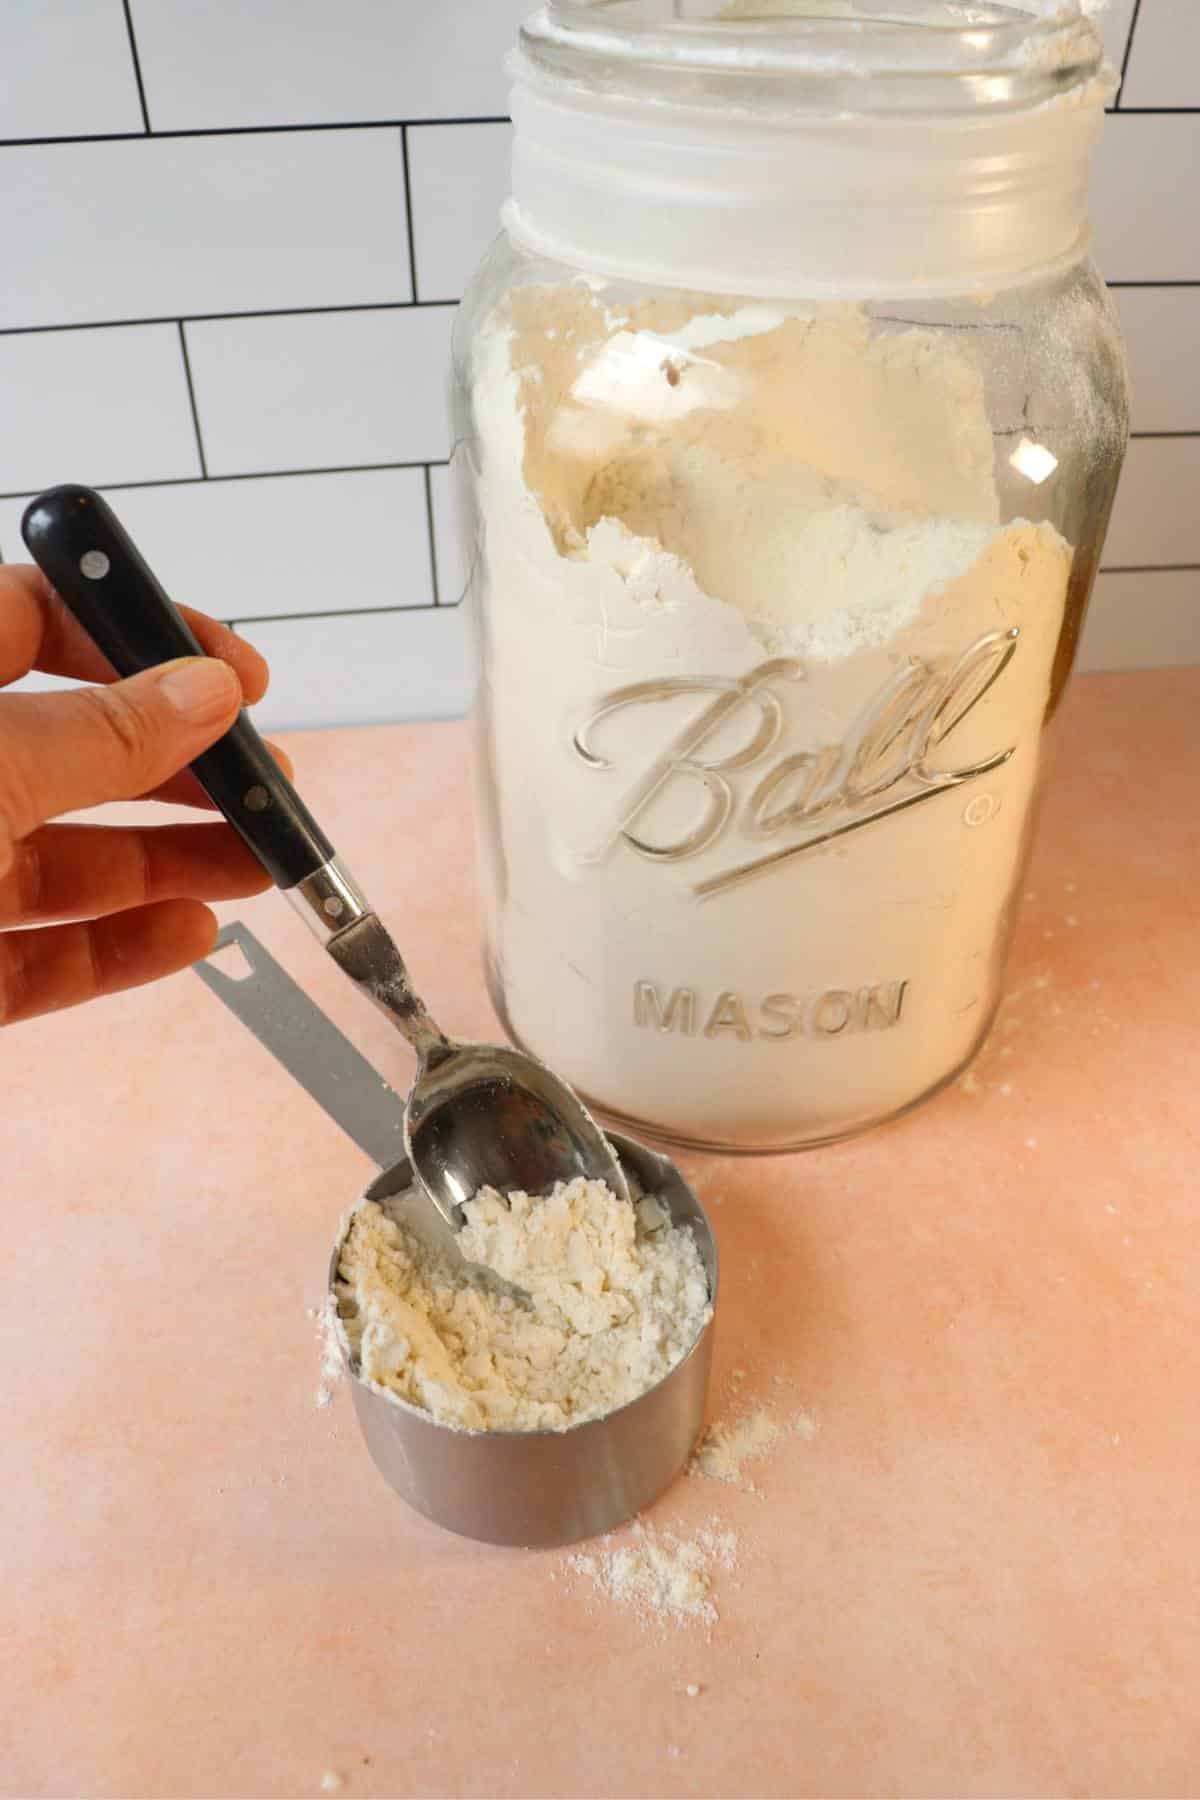
First - Since flour compacts on itself, it's important to either stir the flour before measuring it to fluff it up and to ensure you don't get too much flour, or use a spoon to scoop the flour into the cup until it's full
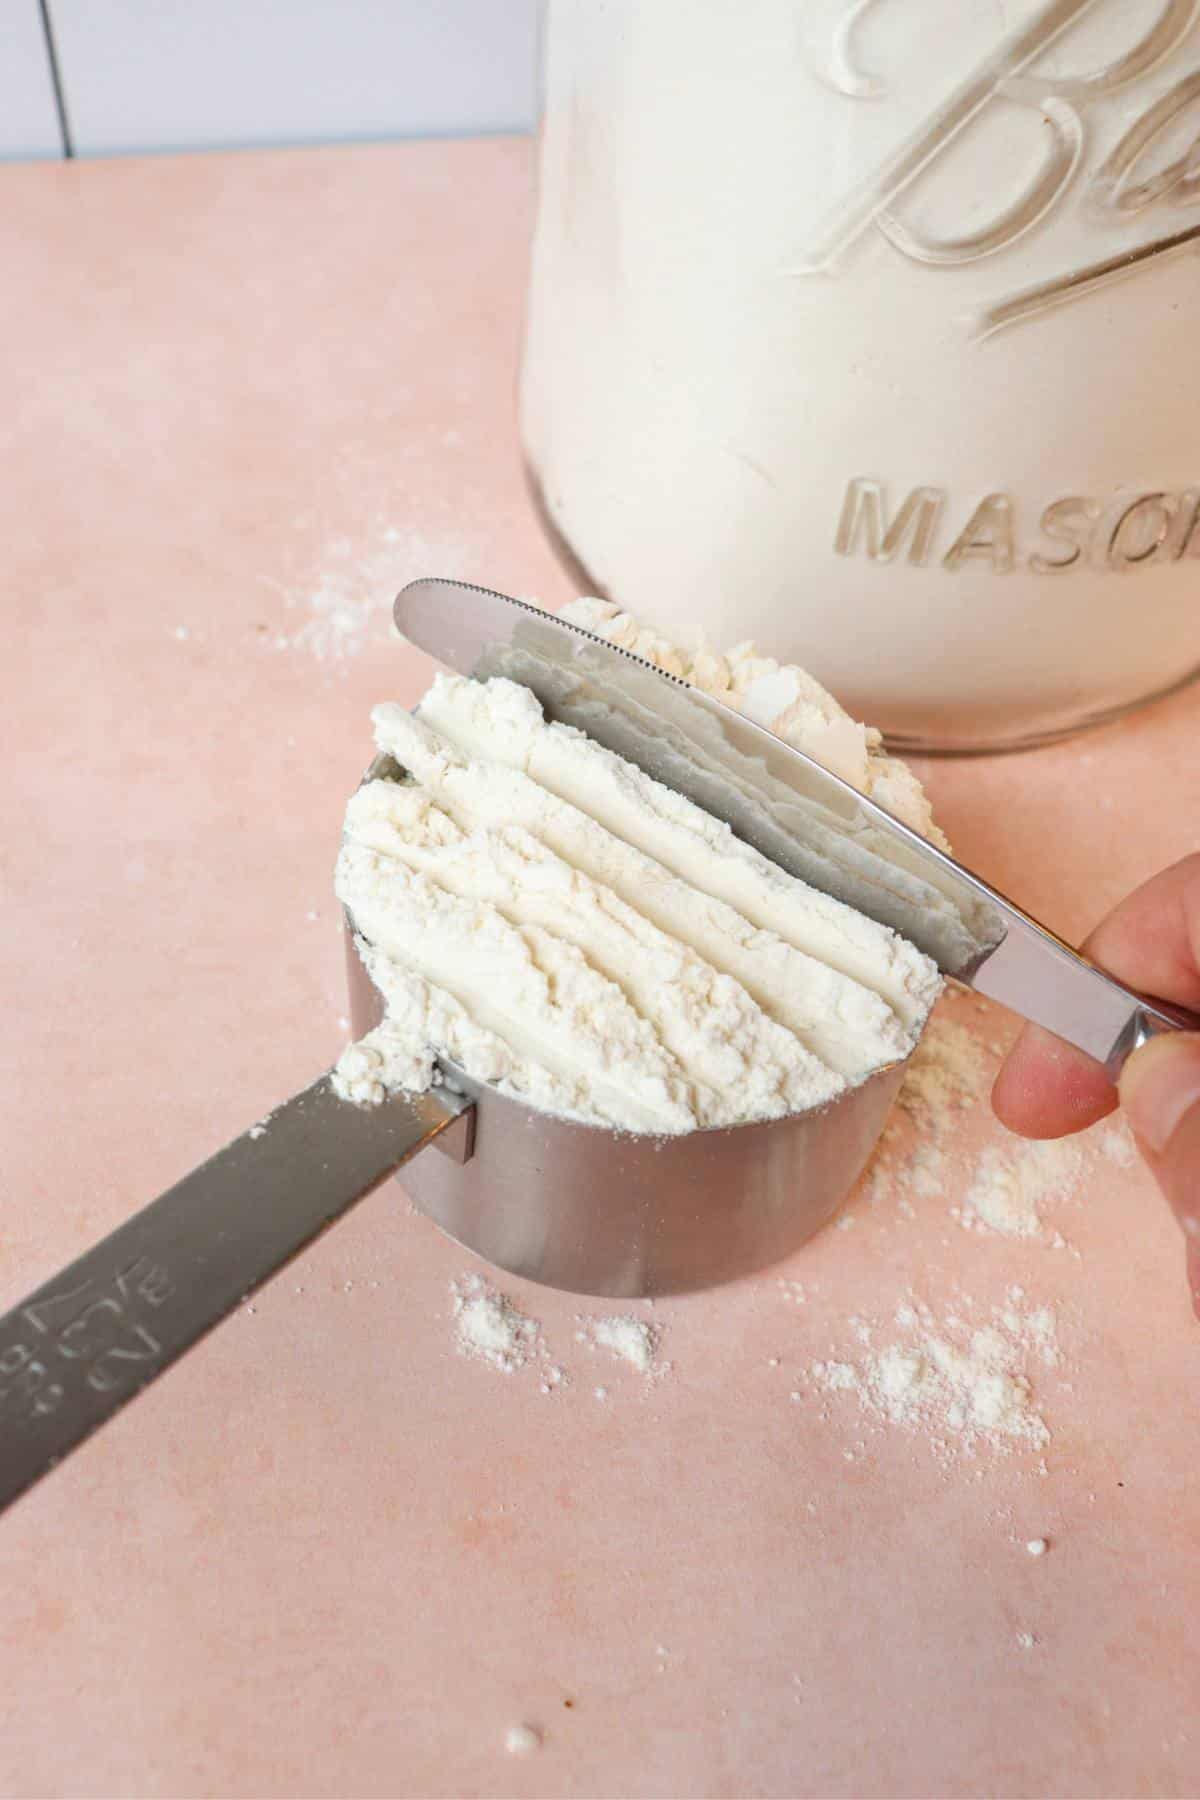
Second, flip over a butter knife to the dull back side, cut some indentations on the top of the flour to help evenly distribute it.
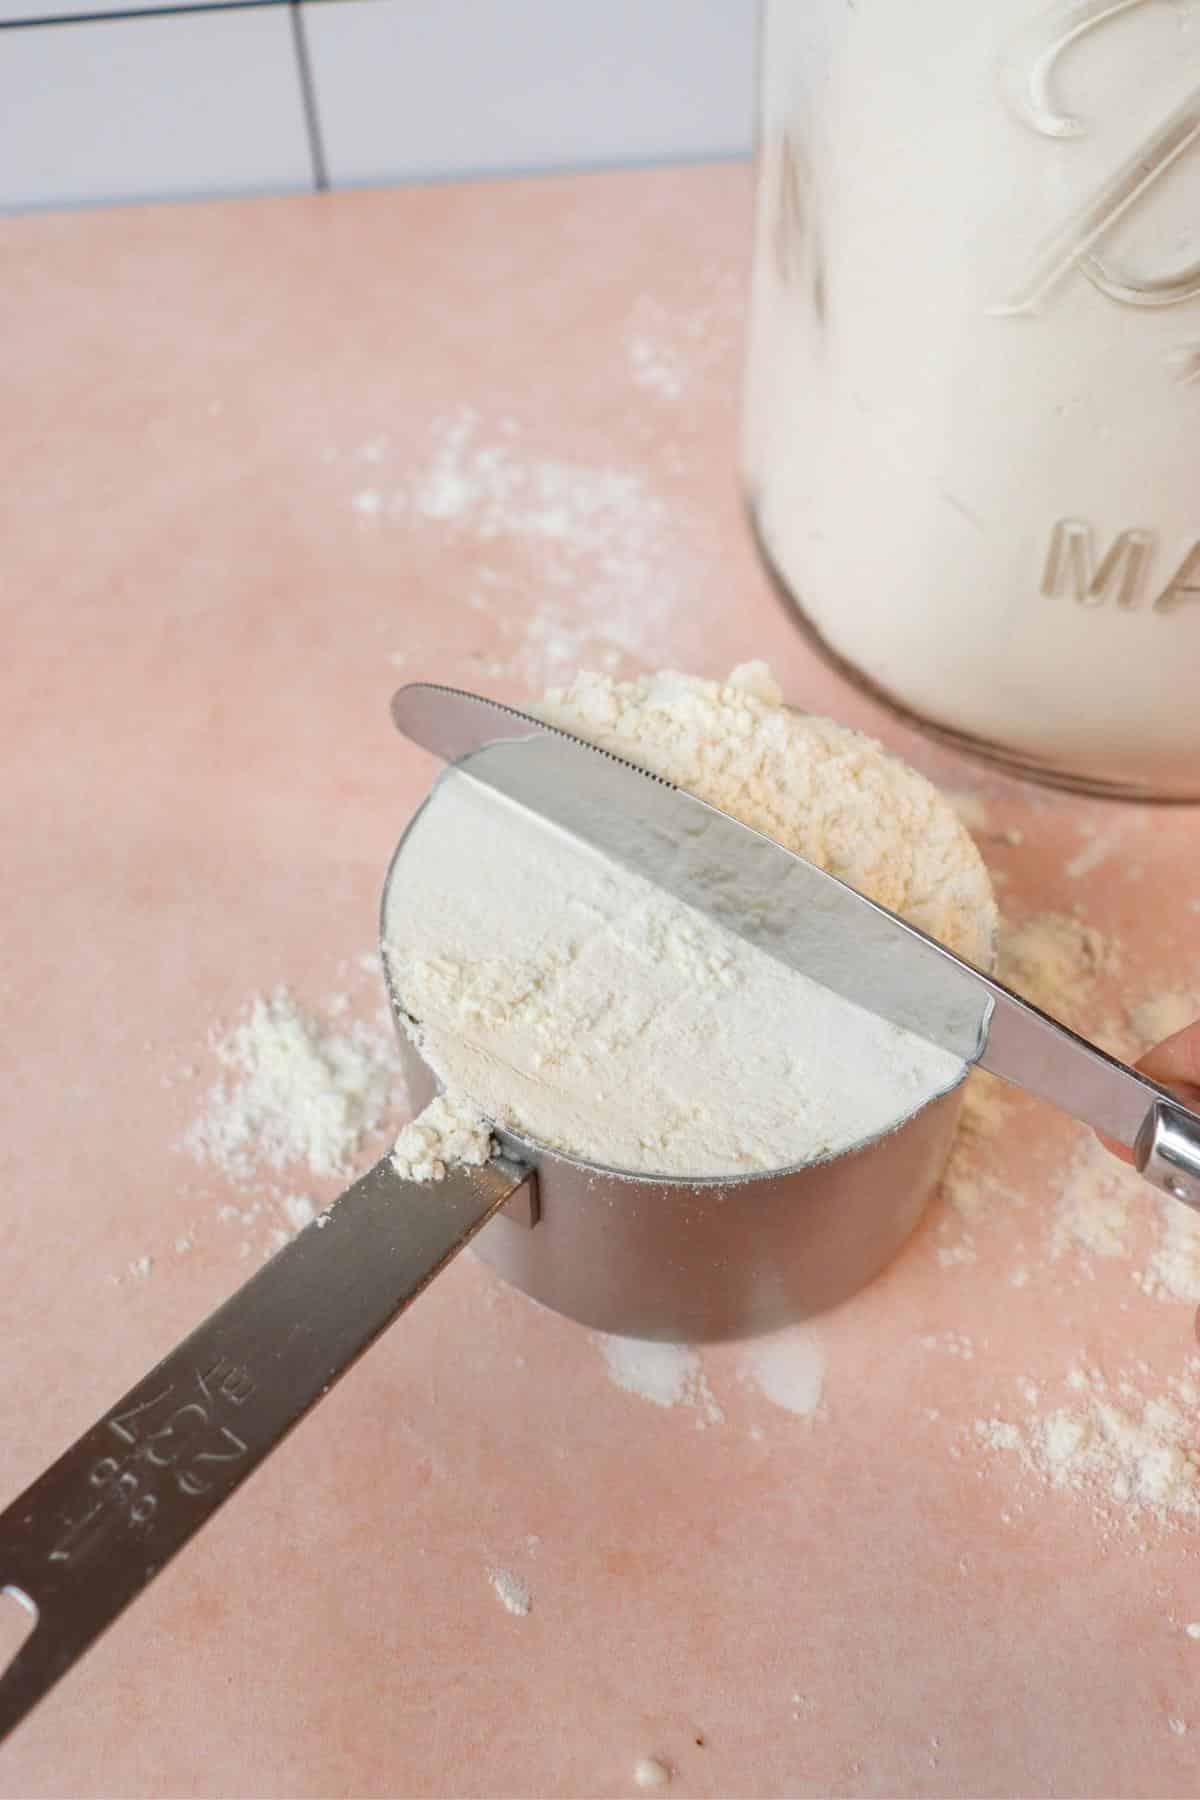
Third, swipe off the excess flour back into the flour jar with the back of a knife, leveling off the top of the flour. This will ensure you have a more accurate cup of flour and don't have too much.
🔪 Directions
Make sure to scroll to the recipe card for full step-by-step instructions.
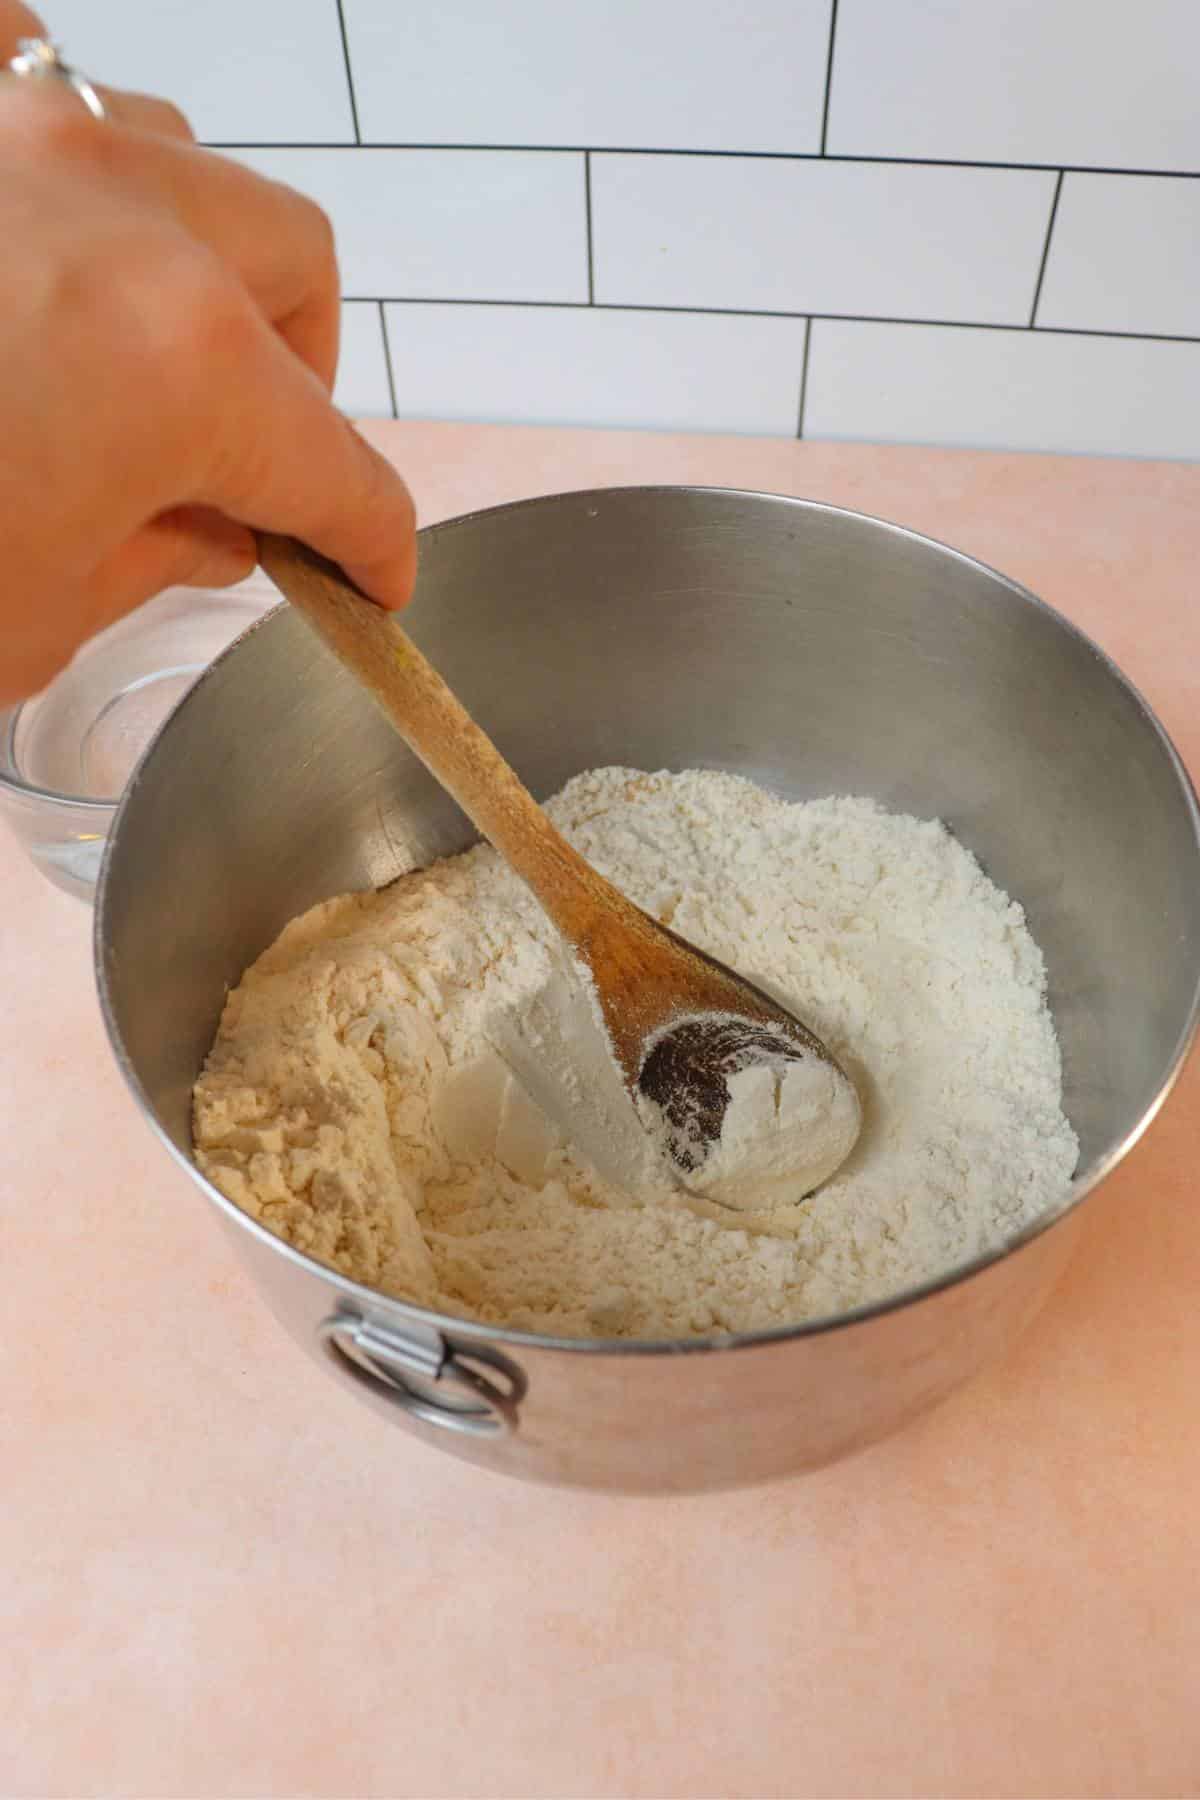
Step one: Measure the flour correctly by either using a kitchen scale, or spooning the flour into the measuring cup (see above for details). Add the dry ingredients into a large bowl and stir.
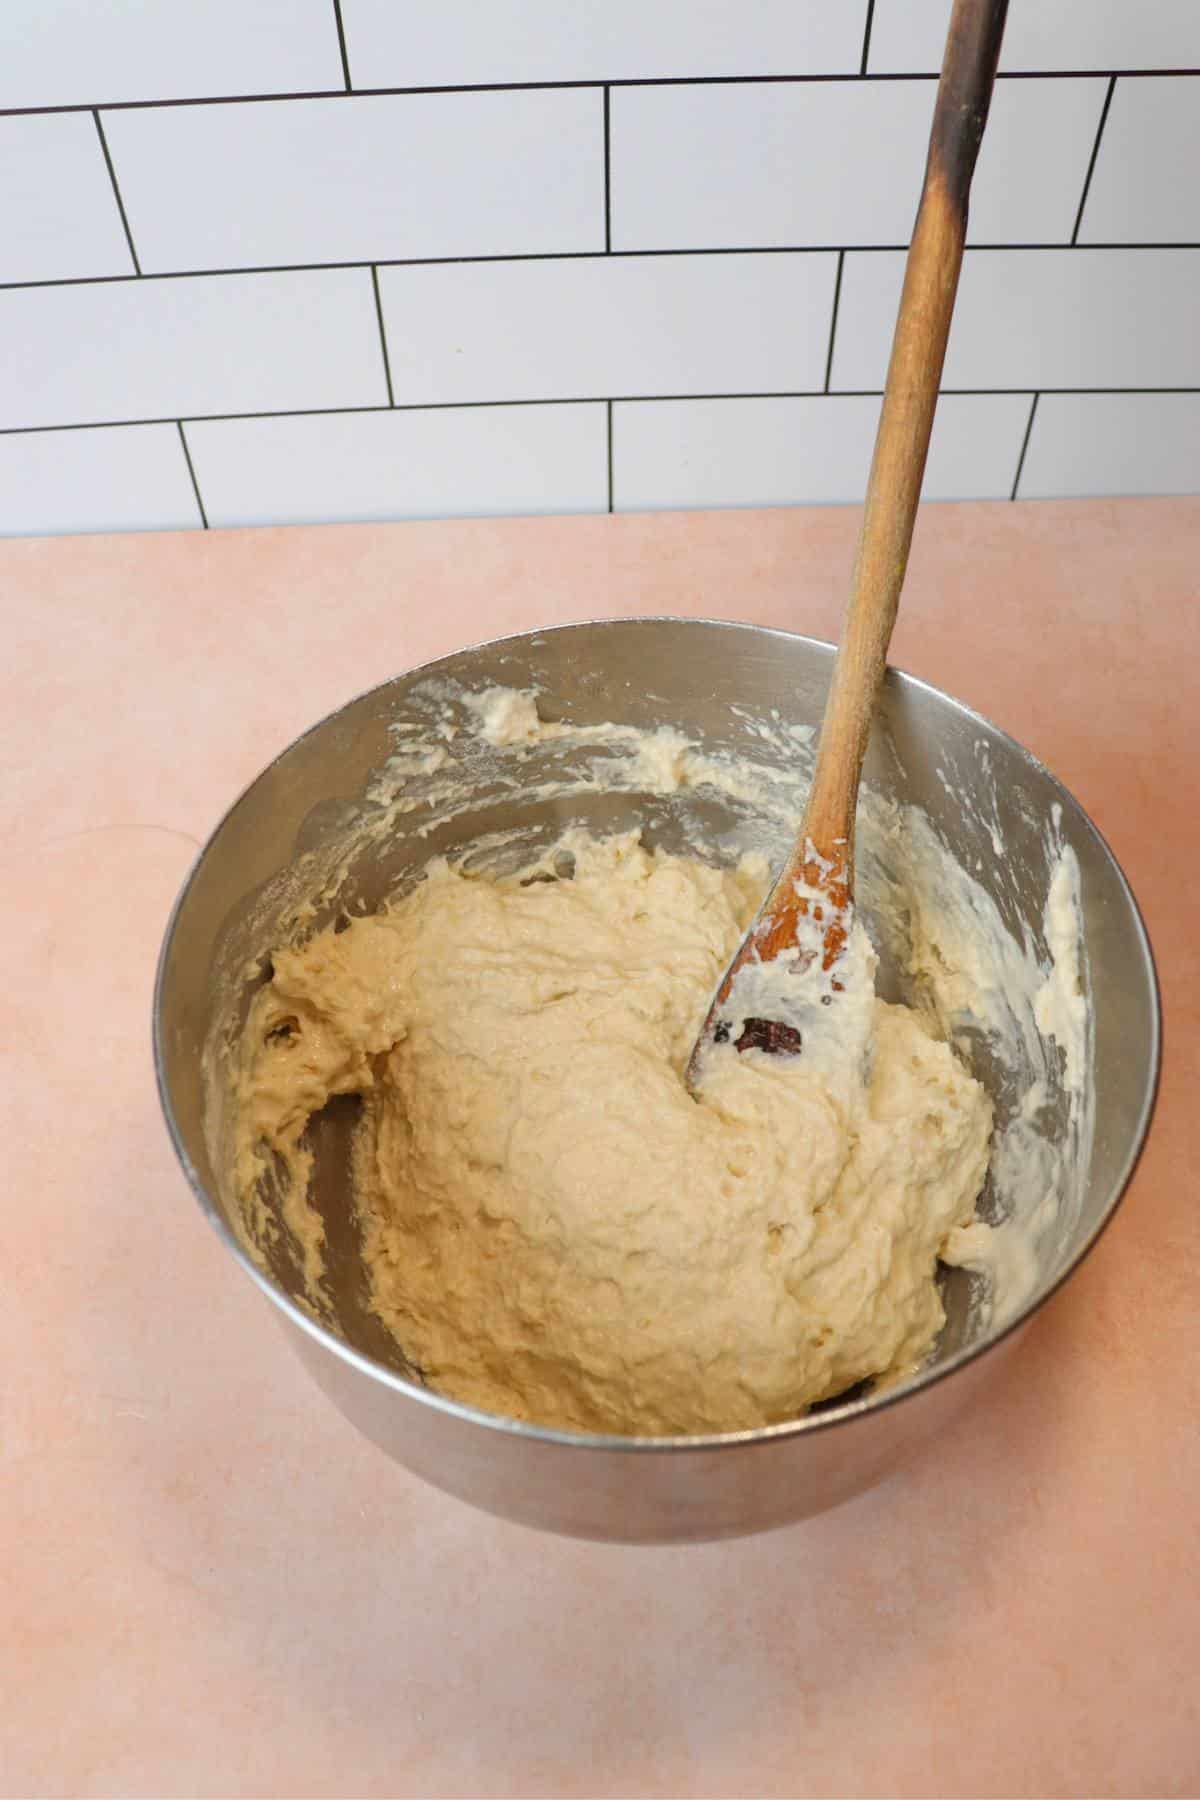
Step two: Then gently stir in the warm water. Mix with a wooden spoon until flour is incorporated.
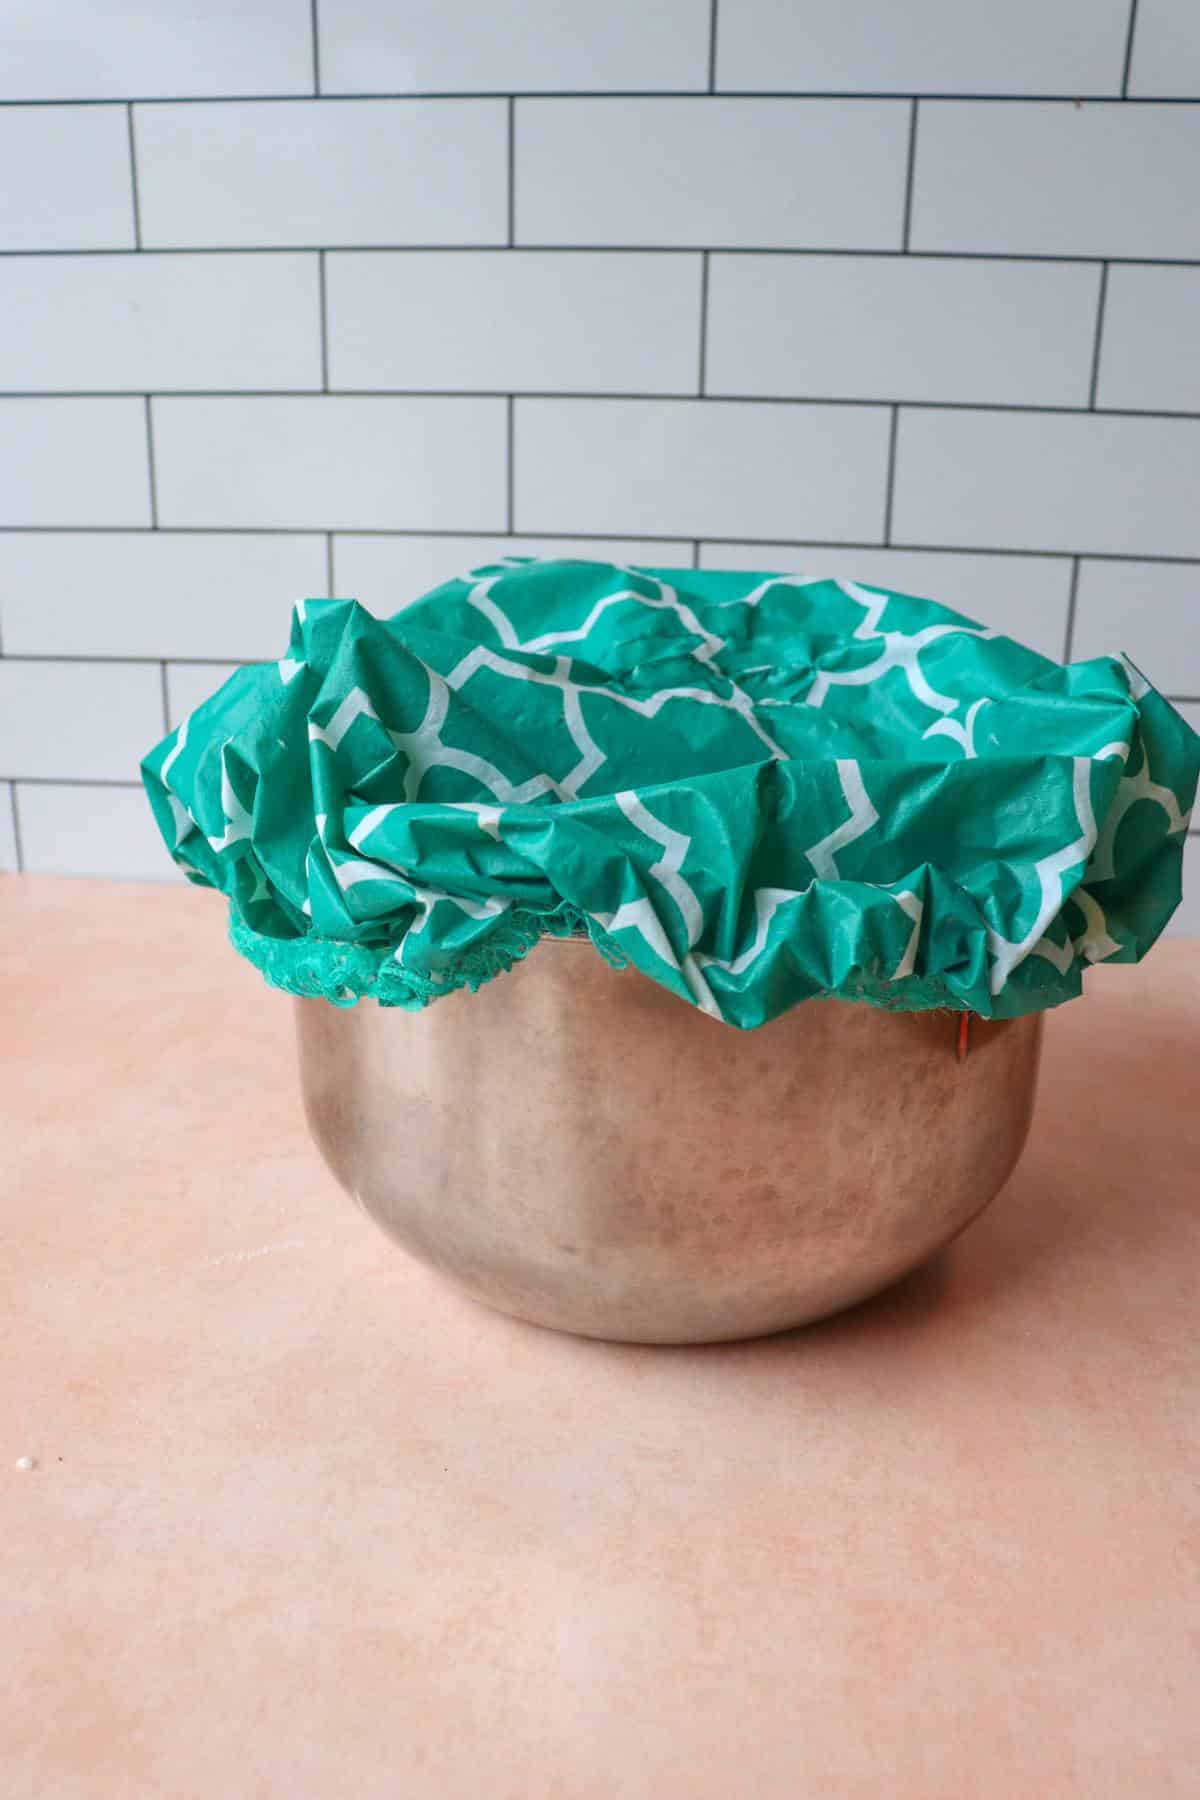
Step three: Cover with a towel, saran wrap or a dutch oven lid and let it rise for about 8 hours in a warm place like an oven with the light on. Pro tip: use a shower cap (unused of course) to cover the bread, it fits every mixing bowl perfectly.
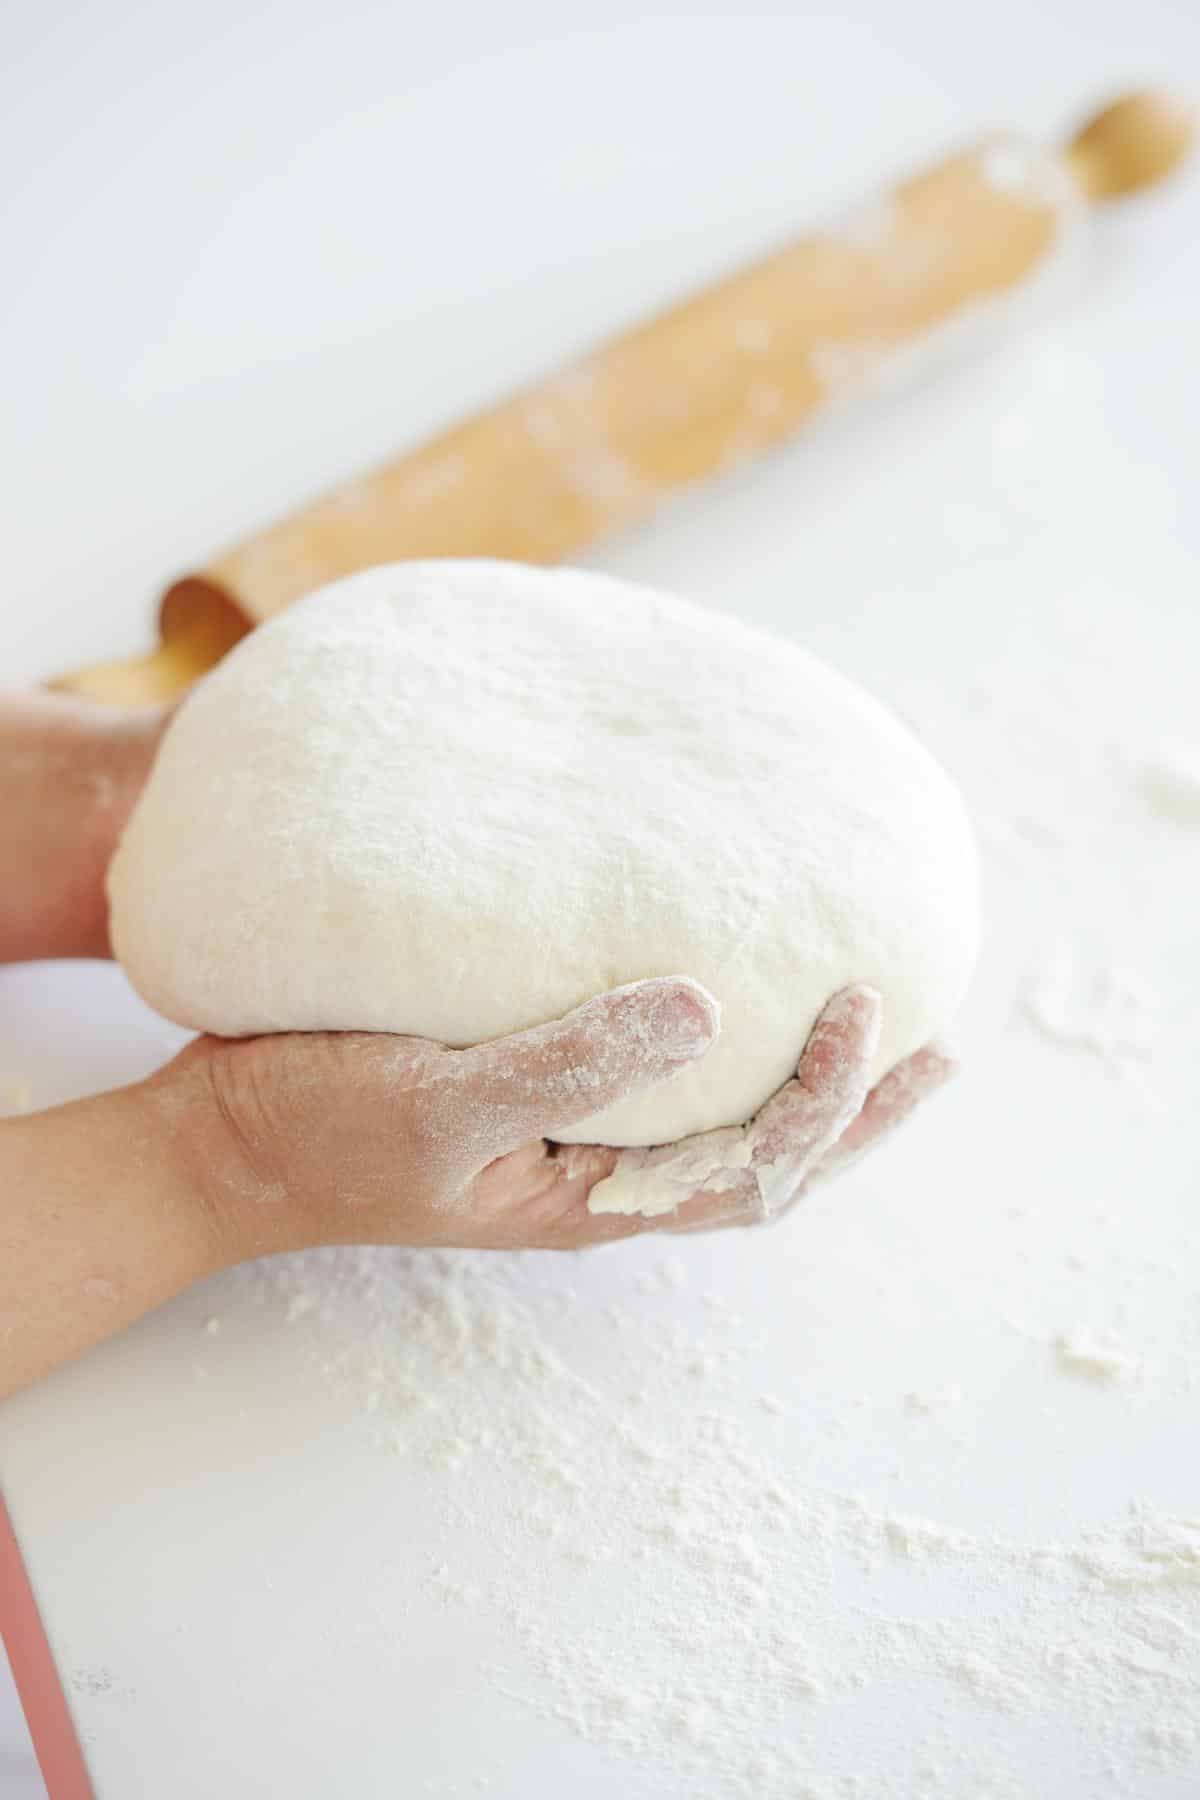
Step four: Pre-heat oven to 450 degrees after letting the dough rise for 8 hours. Flour a clean surface and place the dough on the surface. Sprinkle the dough with a little flour to prevent it from being too sticky.
Knead for about 30 seconds. The longer you knead, the chewier and more dense it will be, so knead to your liking. If you want an airy and fluffy bread with a lot of hole pockets, don't knead the bread at all, and just form it into a loaf.
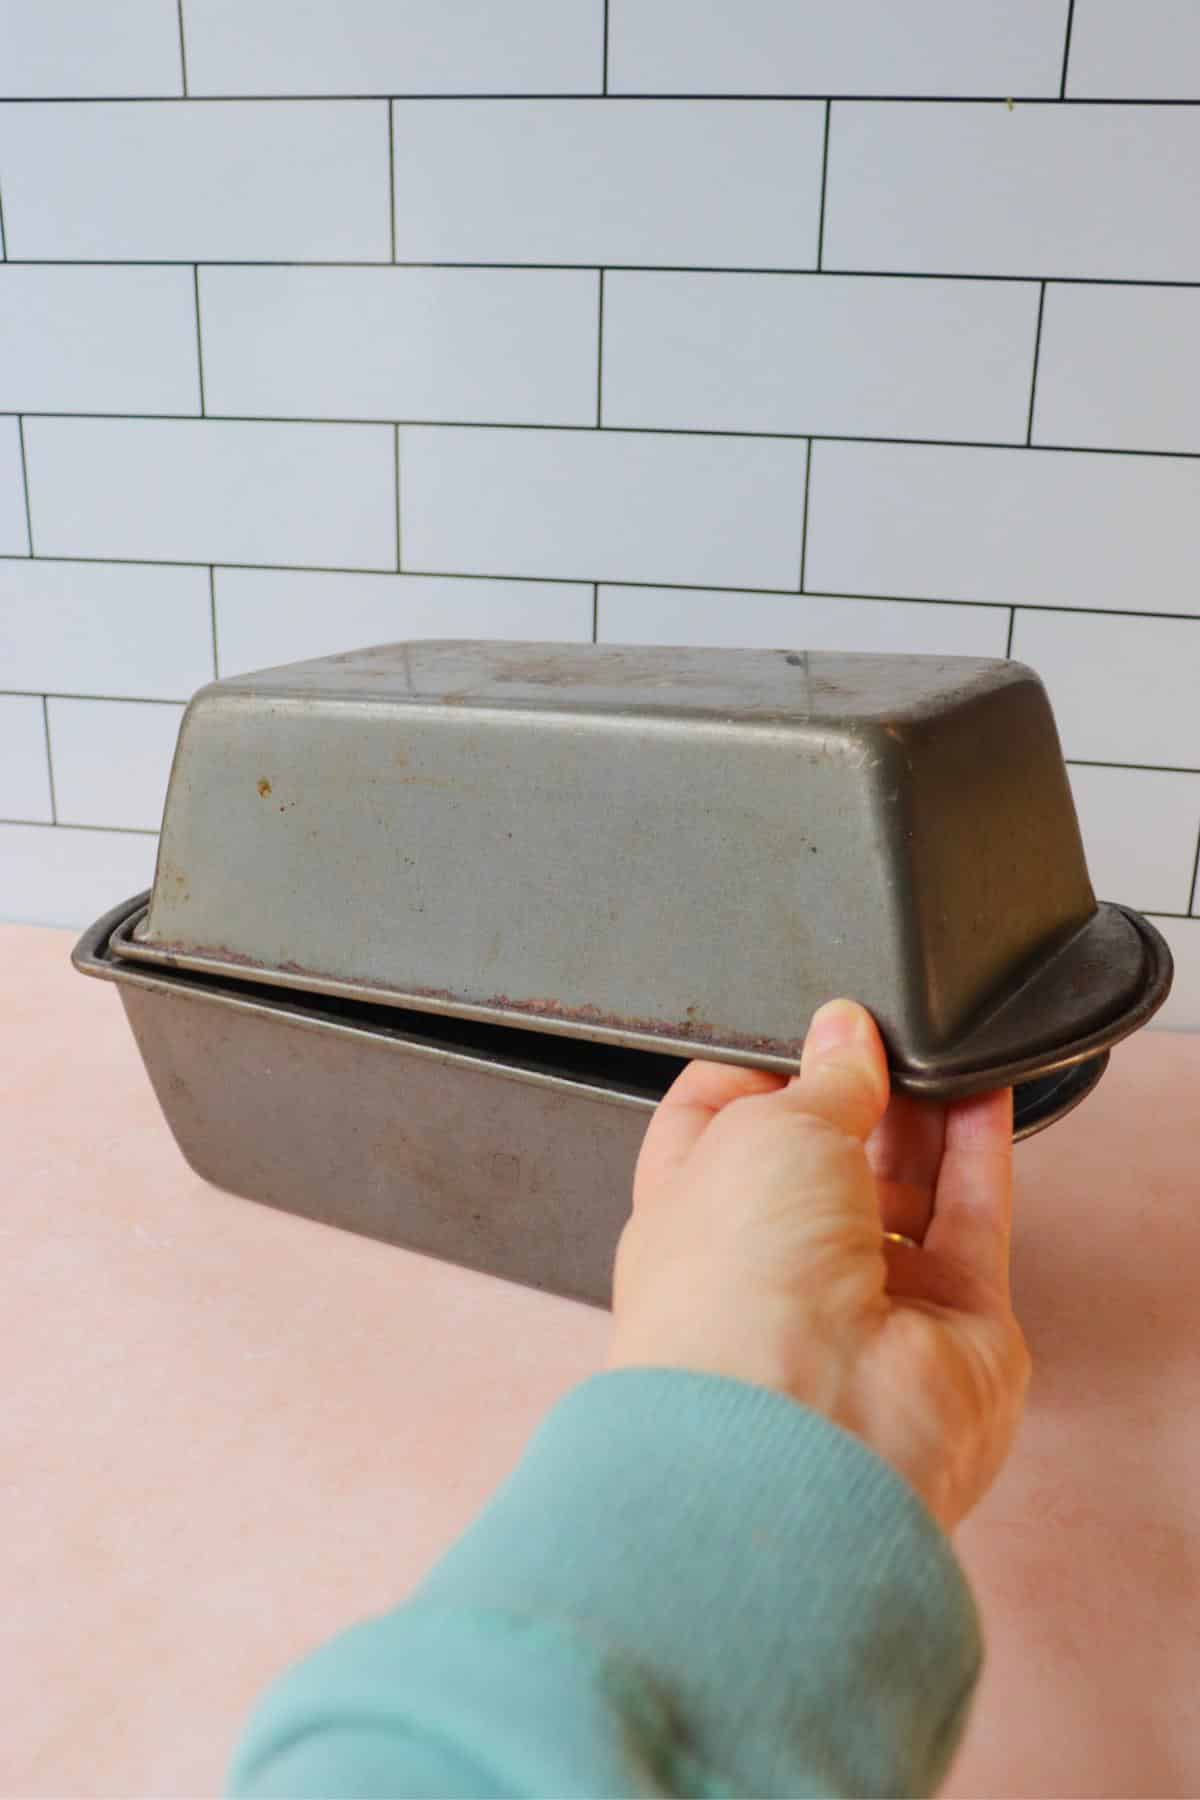
Step five: Place dough in an oiled bread pan and cover with some sort of lid. I usually flip another bread pan upside down on top of this as a makeshift lid (see photo below). You can also bake this in a dutch oven with a lid. Bake for 30 minutes.
Step six: Remove lid and turn down the oven to 420 degrees. Bake for another 10-15 minutes, or until the crust looks golden brown. Take bread out of pan and let it cool on a wired rack for at least an hour before slicing into it.
🍞 If the dough isn't rising
- The #1 reason your dough isn’t rising is probably due to using old, or inactive yeast. Buy a new packet, and store it in the freezer. Make sure you buy dry, active or instant yeast. I haven’t tried this recipe with any other type of yeast. I had this problem when I used yeast that was about a year old. Once I bought new yeast, it rose right up.
- Make sure that your water is lukewarm. If it’s too hot it can kill the yeast. Stick your finger in the water to test, and if it’s comfortable, but warm, it’s good to go
- When letting the dough rise, it must be covered with a towel, saran wrap, or a dutch oven lid.
- Don’t let the dough rise in a drafty or cold room. Yeast does best in a 75-90 degree room. If the room is too cold, the yeast will take a really long time to activate and rise.
- Let the dough rise in the microwave or in the oven with the light on. MAKE SURE THEY ARE TURNED OFF. These places are good to let it rise because there is no draft.
- Give it enough time. This dough needs at least 8 hours and it needs more time if the room is cold.
🥜 How to serve
This works great for sandwiches. Try it out with my easy vegan chickpea salad sandwich, tofu egg salad sandwich or vegan chicken salad sandwich.
One of my favorite ways to eat this plant-based bread is to dip it in some lightly salted, high quality olive oil when it's still warm.
There are few things better in life than warm homemade bread, fresh out of the oven.
This vegan bread also makes amazing toast, or vegan grilled cheese sandwiches.
Spread some peanut butter or vegan butter on a slice. This is a great choice for a basic pizza dough as well.
❄️ Storing and freezing
This will keep in an airtight bag for about 3-4 days. If you live in a hot climate, store it in the fridge so it doesn't get moldy.
You can freeze bread! Make sure to put it in a freezer friendly bag and freeze for up to 3-5 months. Let it thaw on the counter when you want to eat it.
❓Recipe FAQs
Vegans can eat a variety of bread since most bread is made with just flour, water and yeast and don't contain animal-based ingredients. The only breads vegans can't eat are the few breads made with eggs or egg whites, butter or milk like Indian naan bread, or Jewish challah.
Dry yeast can either be active or instant. "Instant" means that it's ready for use right away and doesn't need to be activated in warm water. "Active" means that it needs to be activated in warm liquid before using.
I've used all purpose flour for this recipe many times and it's worked out just fine. Bread flour tends to be a bit chewier, because of it contains more gluten (and therefore, protein), but all purpose flour gets the job done just fine.
🥯 More recipes to try
If you loved this recipe, leave a 5 ⭐️ rating on the recipe card and comment below!
📖 Recipe
Best vegan bread recipe (3 ingredients)
Equipment
- Dutch oven optional
Ingredients
- 3 cups bread flour (see notes)
- 1¾ cups lukewarm water
- ¼ teaspoon dry active yeast
- 1 teaspoon salt
Instructions
- Measure out the flour correctly by spooning it into a measuring cup, then leveling it off. See the blog post above for photos. In a large bowl, combine the bread flour, salt and yeast and stir. Stir in the lukewarm water. Mix gently with a spoon until all of the flour is incorporated3 cups bread flour, ¼ teaspoon dry active yeast, 1 teaspoon salt, 1¾ cups lukewarm water
- Cover with a towel, saran wrap or a dutch oven lid and let it rise for 8 hours - it will puff up and look crazy. I like to store it in my oven (not turned on, of course) with the light on to help it rise.
- Pre heat the oven to 450 degrees after the 8 hours of rising.
- Flour a clean surface and place the dough on the floured surface. It helps to get it out with a plain butter knife so it won't stick to your hands. Sprinkle the top of the dough with a little bread flour so it's not as sticky
- Knead the dough for 30 seconds. Knead it longer if you'd like the dough to be more dense. The less you knead the dough, the more spongy and fluffy the bread is.
- Oil a bread pan and place the dough in the pan.
- Cover the bread pan with another bread pan turned upside down (covering the bread while baking allows it to steam and form a crust). You can also bake this bread in a small dutch oven with the lid.
- Bake, covered for 30 minutes. After 30 minutes, turn the oven down to 420 degrees. Remove the bread pan lid and bake uncovered for another 10-15 minutes, or until the top of the bread looks crispy and golden brown.
- Once it's done baking, take it out of the bread pan and let it cool on a rack
Video
Notes
- 1 cup whole wheat flour and 2 cups of bread flour
- 1 cup of oat flour (just grind up oatmeal in a blender to make flour) and 2 cups of bread flour
- 1 cup of oat flour and 2 cups of whole wheat flour (this will just make the bread a little more dense When making any of these healthier versions, you may have to bake it an extra 10 minutes covered. So instead of 30 minutes covered, 20 minutes uncovered, cook it 40 minutes covered and 20 minutes uncovered. Make this dough before going to bed and pop it in the oven in the morning so you have less waiting time and you can have fresh bread the next day. After letting the dough rise, it's easier to take the dough out of the bowl with a butter knife, rather than your hands. It will stick to your hands more. After opening the yeast, store the packets in the freezer. The yeast will last forever in there. Just make sure to put them in a freezer friendly, sealed bag or container if opened.
Nutrition
The nutritional information on this website is only an estimate and is provided for convenience and as a courtesy only. The accuracy of the nutritional information for any recipe on this site is not guaranteed. It should not be used as a substitute for a professional nutritionist’s advice.


Nadine
Great and easy, by the time I wake up it’s ready to bake for breakfast and my friends at work. I love it . Thank you
Maria
So glad you loved the recipe, Nadine! It's been a weekly staple in our house because of how easy and delicious it is. My husband used to go to the bakery for fresh bread once a week but now he doesn't need to thanks to this recipe.